Don't drive around with your car looking like its winking at oncoming traffic. Its a road hazard, be respectful of the others on the road.
No tools needed for most cars. Some cars require removal of certain components to access the back of the headlights.
Go to your parts store and ask them to look up what bulbs your car takes. Some cars have separate bulbs for the low beams and high beams. My Subaru does, but my old Honda only had one. Also, get a small pack of Dielectric grease. This prevents corrosion on the electrical connectors.
Step 1
For my car, there is a weatherproof cover that covers the electrical connectors to protect them from moisture. Because of this I personally don't use Dielectric grease to protect my electrical terminals. If you have one of these, remove it. Mine comes off by simply rotating it and pulling back.
Step 2
Unplug and remove the old bulbs. I have H1 bulbs which are small and held in by a metal clip. Some bulbs are in a plastic housing and twist out. Disconnect both electrical terminals, one is the ground and you don;t necesarrily HAVE to remove it but its easier out of the way. You can see the metal clip on the left, push it in and down. Then it will rotate out of the way.
Step 3
Remove old bulb. Reinstall new bulb in reverse order. This is where you would apply the dielectric grease to the terminal on the bulb. DO NOT TOUCH THE GLASS OF THE NEW BULB!!! The oil on your bare fingers will cause the glass material to burn out faster.
I used Sylvannia Silver Star bulbs to make them a bit brighter.
Heres the before
Heres the after
Enjoy having an illuminated road at night!
Dedicated to educating people on basic car functions and repair, with a focus on helping students save money by working on their own cars while away from home.
Saturday, July 12, 2014
Friday, July 11, 2014
How To Change Your Wipers
Something that is often over looked but is SUPER easy to change, windshield wipers are really important, for obvious reasons.
No tools needed.
Step 1
Go to your local parts store and you can either ask them to look up your wiper sizes (typically the drivers side is longer than the passengers side). Or you can use one of these machines that are typically set up where the wipers are displayed.
Step 2
Raise your wiper arms up, they typically stay up because of the springs at the joint.
Step 3
Remove your wiper. This is different for each brand/style of wiper. Typically theres a clip to push. On mine, you have to first grip the cover.
Then pull it up.
Then slide it down to remove it.
Step 4
Install new wipers in reverse procedure. DONE! Enjoy having a clean windshield in a rain storm.
Note: Just because your wipers are leaving streaks doesn't necessarily mean that they are bad. There could be dirt clogging the blades that push the water, breaking the seal and leaving streaks. Simply raise them up and clean then off gently with your finger. Also, it is crucial to keep your windshield clean as well. Sap and other road grime builds up and causes an uneven surface for the blades to run across. Also, not to mention a dirty window is a safety hazard while driving, especially at night because it can cause lights to glare on the glass, impairing your vision.
No tools needed.
Step 1
Go to your local parts store and you can either ask them to look up your wiper sizes (typically the drivers side is longer than the passengers side). Or you can use one of these machines that are typically set up where the wipers are displayed.
Step 2
Raise your wiper arms up, they typically stay up because of the springs at the joint.
Remove your wiper. This is different for each brand/style of wiper. Typically theres a clip to push. On mine, you have to first grip the cover.
Then pull it up.
Then slide it down to remove it.
Step 4
Install new wipers in reverse procedure. DONE! Enjoy having a clean windshield in a rain storm.
Note: Just because your wipers are leaving streaks doesn't necessarily mean that they are bad. There could be dirt clogging the blades that push the water, breaking the seal and leaving streaks. Simply raise them up and clean then off gently with your finger. Also, it is crucial to keep your windshield clean as well. Sap and other road grime builds up and causes an uneven surface for the blades to run across. Also, not to mention a dirty window is a safety hazard while driving, especially at night because it can cause lights to glare on the glass, impairing your vision.
Sunday, June 29, 2014
Need new Speakers?
Alright, so today I will be showing you how to install new speakers into your car. This is a fairly universal process, meaning its basically the same on every vehicle.
Tools I used:
Phillips Screw driver
Wire Strippers
Wire cutters
Wire connectors
Step 1
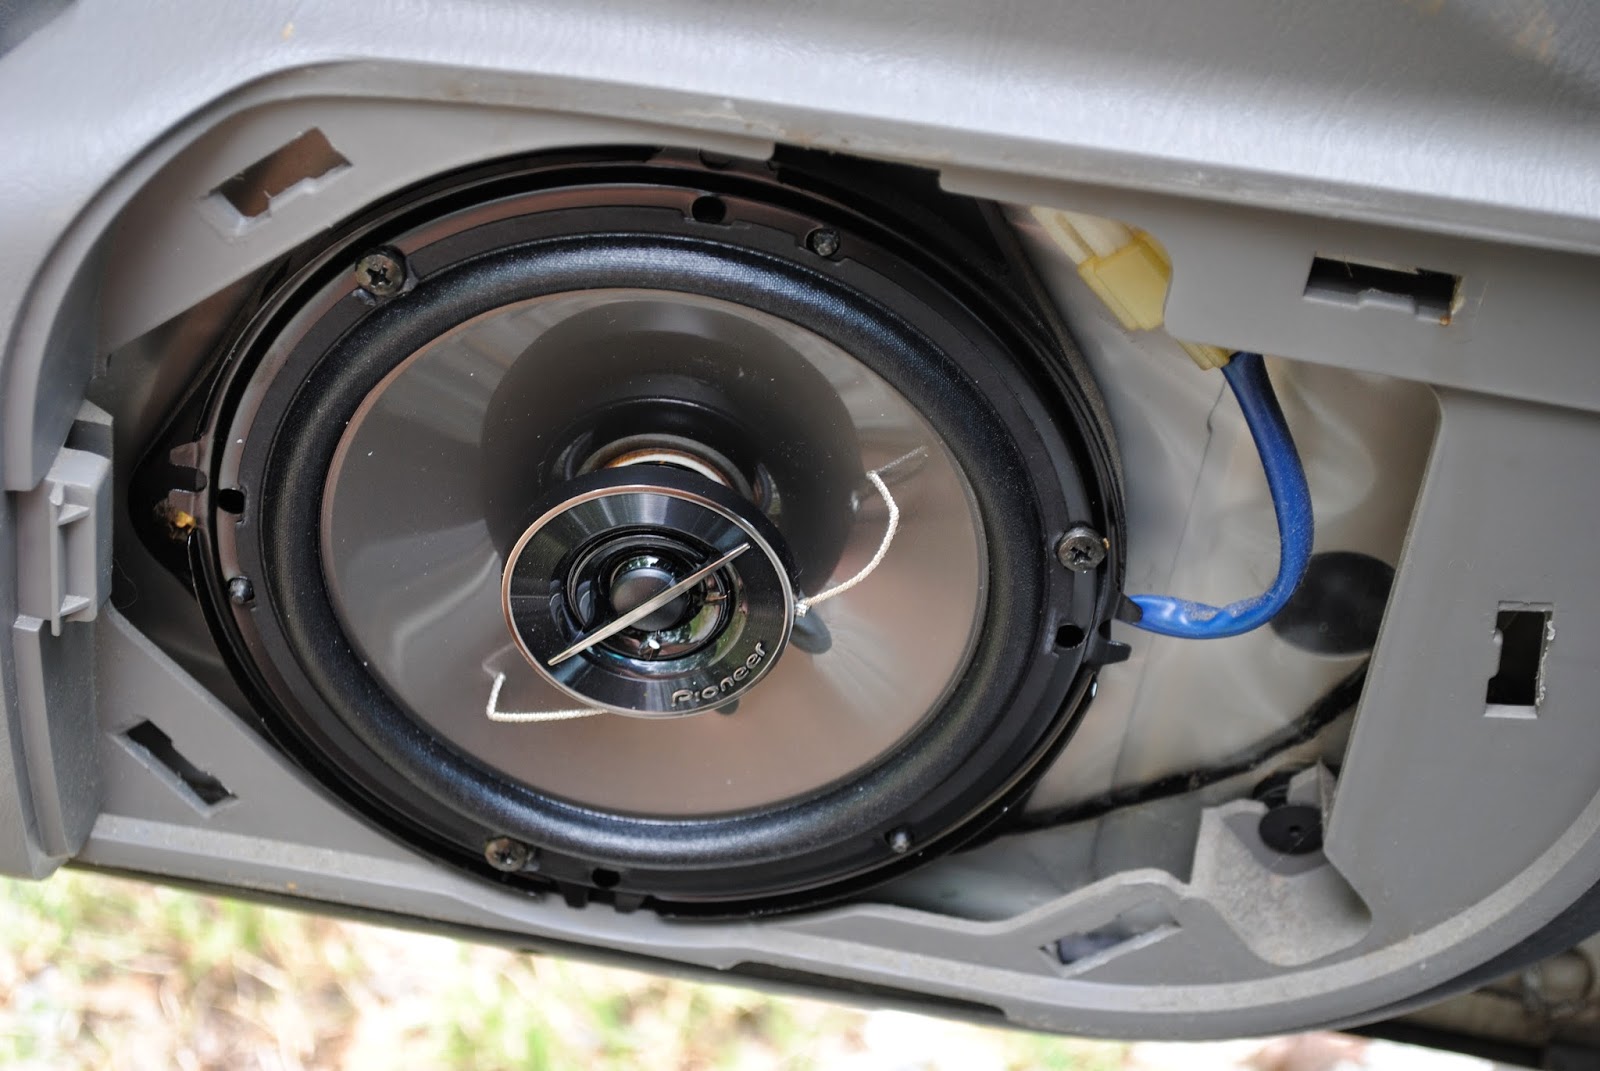
Remove the door panel and/or speaker cover. I'm using my fathers 2001 Subaru Forester again so the speaker cover just pops right off. Some people will have to remove the entire door panel (I do in my '01 Outback) to change the speakers. In which case additional tools will be needed.
Step 2
Remove speaker by unscrewing the three (in my case) black screws holding the speaker to the frame. MAKE SURE you don't unscrew the speaker housing instead of the speaker, its a waste of time.
Step 3
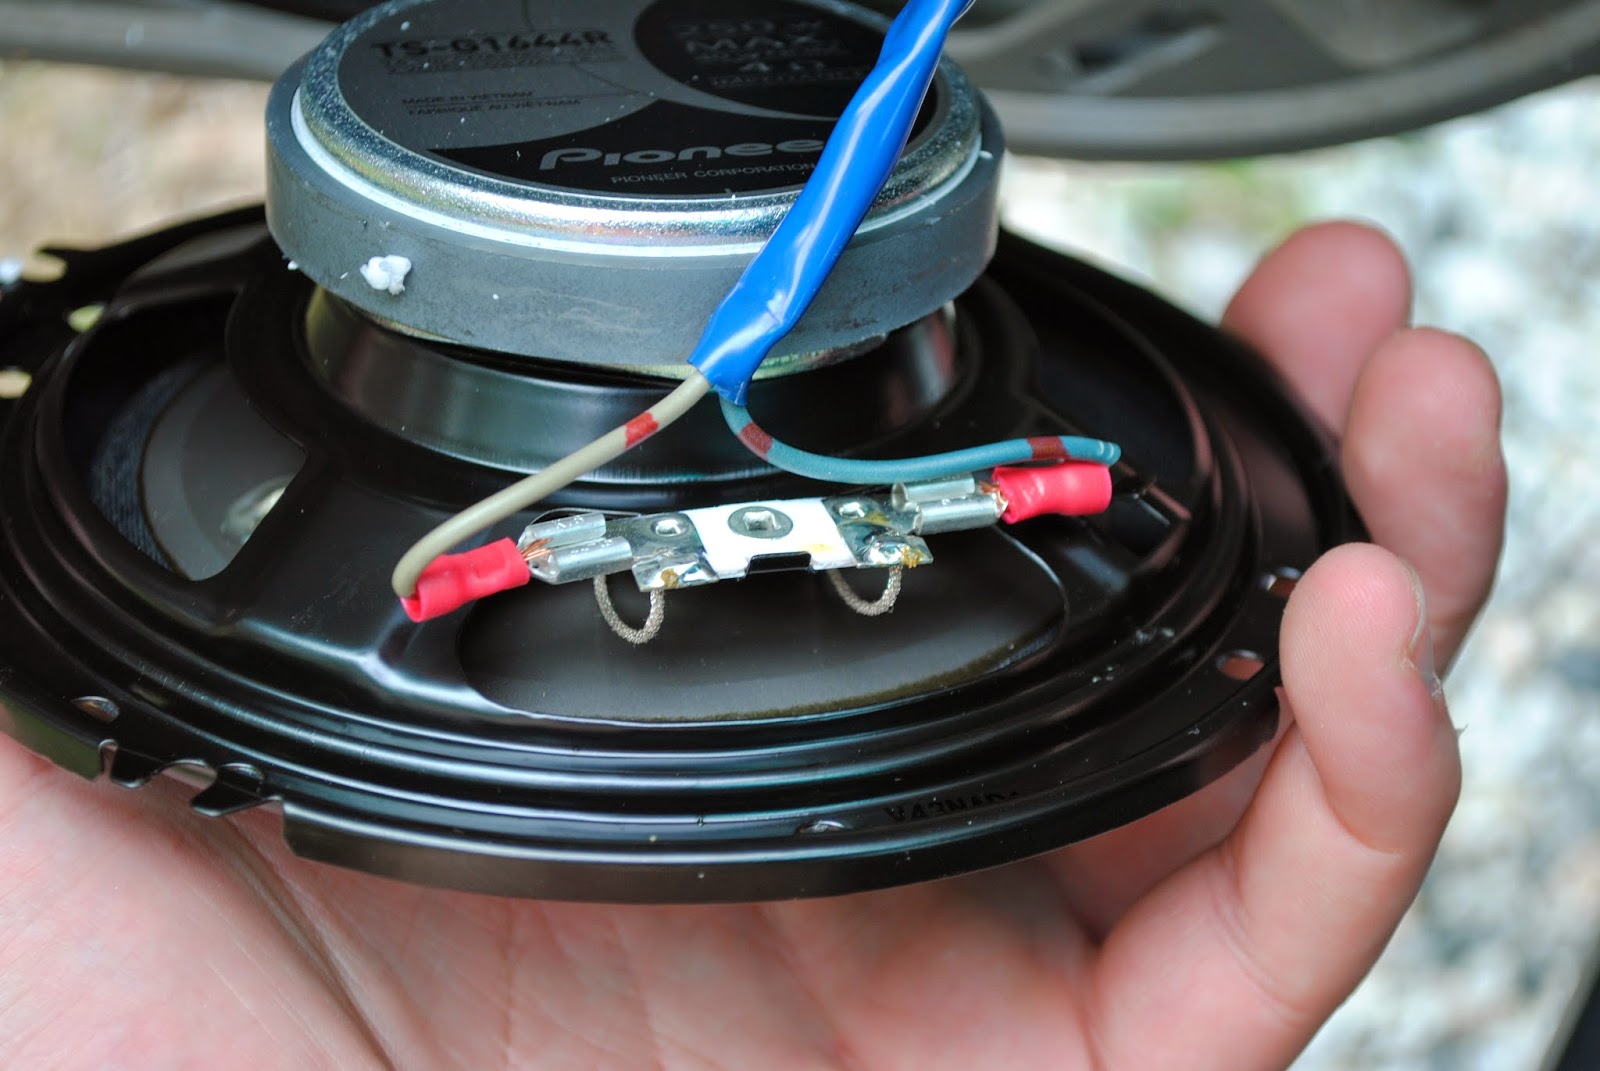
Remove wiring. Now, on my 92 Honda Civic, the speaker wiring was removable. On this car, the wiring is soldered to the speaker terminals. Cut them with your wire cutters. Make sure you remember which one went on the positive or negative side. They should be labeled.
Step 5
Connect wiring.
Step 6
Test/Install Speaker. Holding the edge of the speaker, turn your radio on and make sure sounds plays through the new speaker. If it doesn't, check your work. If it does, install the new speaker in place of the old one. Some speakers will require an adapter to fit some vehicles. My Outback did, my fathers Forester does not nor did my Honda.
All done! Enjoy much better sound over your stock speakers!
Tools I used:
Phillips Screw driver
Wire Strippers
Wire cutters
Wire connectors
Step 1
Remove the door panel and/or speaker cover. I'm using my fathers 2001 Subaru Forester again so the speaker cover just pops right off. Some people will have to remove the entire door panel (I do in my '01 Outback) to change the speakers. In which case additional tools will be needed.
Step 2
Remove speaker by unscrewing the three (in my case) black screws holding the speaker to the frame. MAKE SURE you don't unscrew the speaker housing instead of the speaker, its a waste of time.
Step 3
Remove wiring. Now, on my 92 Honda Civic, the speaker wiring was removable. On this car, the wiring is soldered to the speaker terminals. Cut them with your wire cutters. Make sure you remember which one went on the positive or negative side. They should be labeled.
Step 4
Connect terminals. This is easy, most speaker wire is 18 Gauge, so buy the appropriate size. Strip the wire about 1/2 an inch back and then insert the exposed wire into the new terminal. Then crimp the metal part with the crimping section of your strippers (its usually labeled on the tool).
Connect wiring.
Step 6
Test/Install Speaker. Holding the edge of the speaker, turn your radio on and make sure sounds plays through the new speaker. If it doesn't, check your work. If it does, install the new speaker in place of the old one. Some speakers will require an adapter to fit some vehicles. My Outback did, my fathers Forester does not nor did my Honda.
Step 7
Reinstall door panel/speaker cover.
All done! Enjoy much better sound over your stock speakers!
Wednesday, June 25, 2014
Installing a new radio in a 2001 Forester
Well my dad wanted a radio in his 2001 Subaru Forester that he could hook his iPhone up to and listen to NPR podcasts (he's a historian so go figure. haha).
Heres what we got him (cost about $130). I didn't have time to do the speakers so they will come later. Make sure you get a radio harness that will fit your car. Any parts store can get that for you. Or if you buy it online they typically include them or at least remind you (thank you Crutchfield).
Tools I needed (your car may be different):
Phillips Head Screwdriver
Flat Head Screwdriver
Wire Strippers
Vinyl Electrical Tape
Set up:
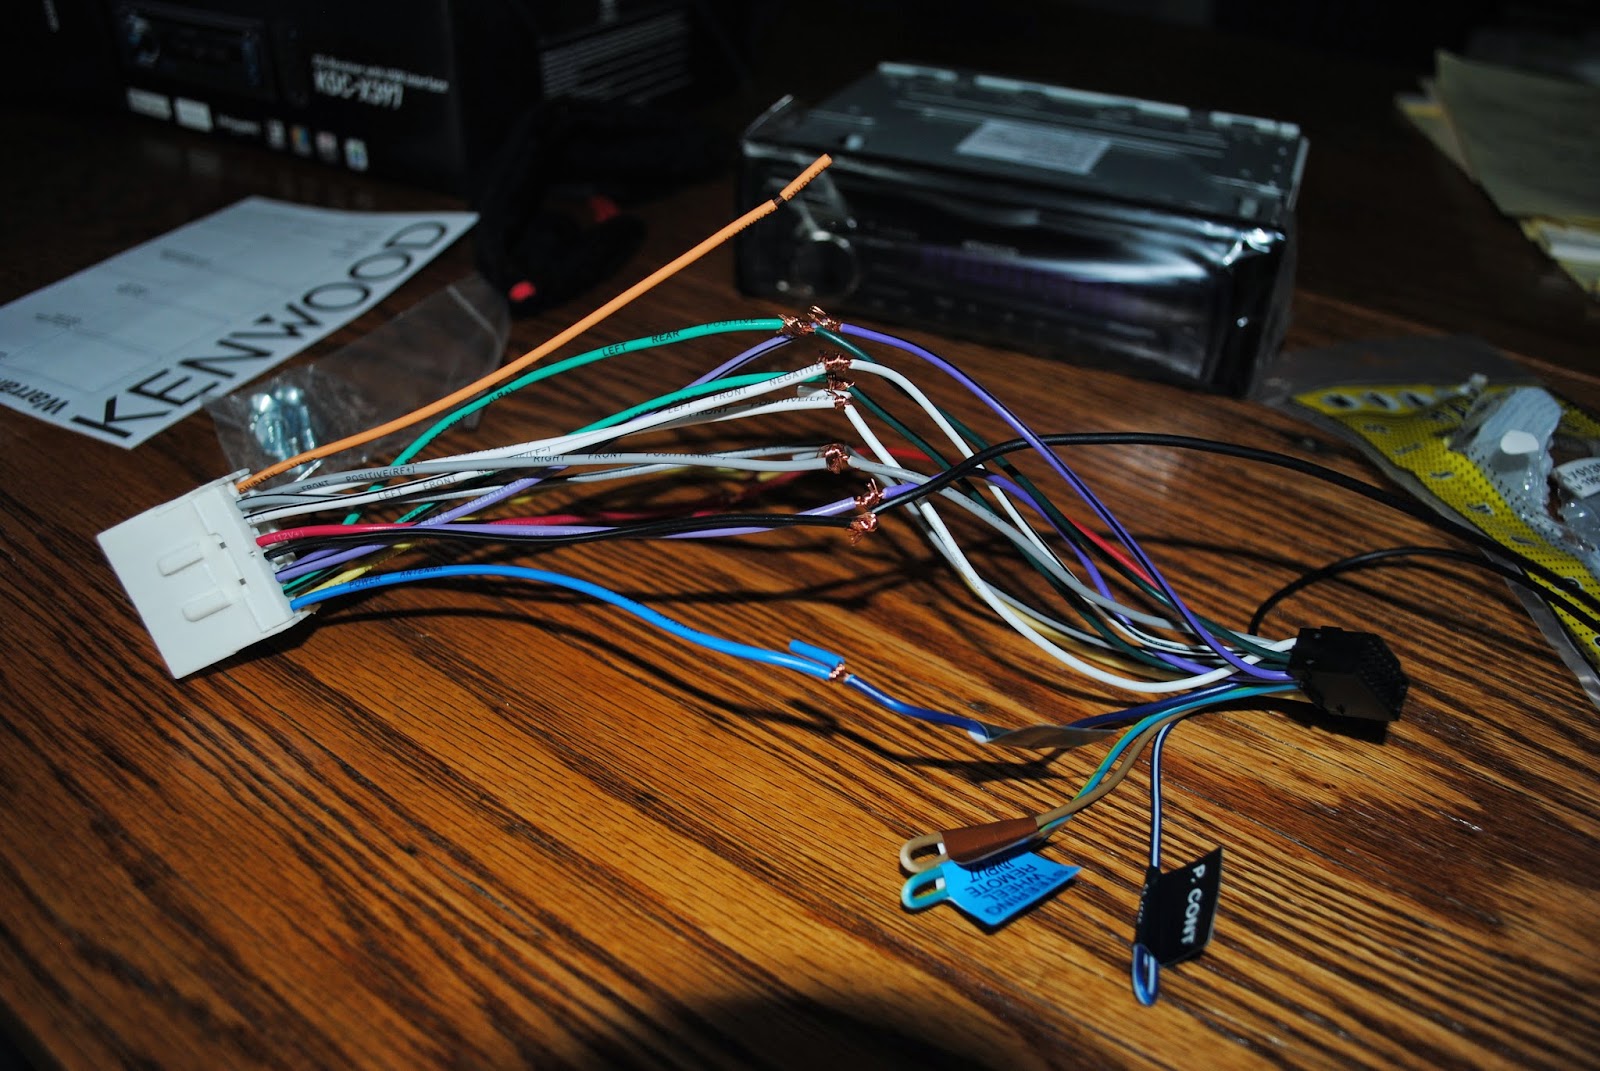
You need to wire the vehicle harness adapter into the radio's adapter. This is super easy! Just match the colored wires together. But pay attention to which colors have a colored line on them.
You may have to strip the wires (about 1/2 inch should do it) on either of the harnesses, I did for the radio side. Most radio wiring fits the 18 or 16 gauge holes.
Then twist them all together.
Then, wrap each section of exposed wire SEPARATELY. You don't want wires touching, that can short out equipment or even start a fire. Thought I took a picture of them wrapped, but I guess not.
Removal/Installation:
First, remove any plastic dash pieces around the radio. All I had to do was pop them out with the flat head screwdriver.
Then remove the screws that are holding in the radio frame. For me that was only the 4 phillips screws you see around the radio and the bin pocket below it.
Then remove radio with frame and disconnect any wires in the back and the antenna.
Here you see the antenna (left) and vehicle harness (right).
Connect the adapter to the harness. BEFORE GOING ANY FURTHER plug the new radio in to ensure that everything works.
Now, remove the old radio, again for me it was two phillips screws on each side of the frame. Install new radio in its place.
Installation is reverse of removal.
VOILA! NEW RADIO!
Sunday, June 22, 2014
Squealing belt?
Does your car make a squealing noise when its turning on, under acceleration, or turning? You probably have a loose belt. Whats the solution? Tighten it!
Disclaimer*
Not all cars have the ability to tighten the belt and you have to fully replace the tightener.
I will be using my fathers 2001 Forester which has a loose A/C belt to demonstrate tightening the belt.
Step 1
- Loosen the lock bolt (green). DO NOT REMOVE.
Step 2
- Tighten adjustment bolt (red) until the belt has about .5 inches of movement.
Step 3
- Tighten Lock bolt.
DONE!
Flat tire?
A surprising amount of people don't know how to change their tire in the case of having a flat. I think this is something that should be taught in Drivers Education but sadly is over looked. So I will try my best to show you how!
Here we shall be using my fathers 2001 Subaru Forester to demonstrate.
No, its not ACTUALLY flat, but who cares? Same principles.
Insert pivot arm into the hole on the scissor jack. Grasp the main rod with your secondary hand (left for me)
Grasp offset part with main hand.
Here we shall be using my fathers 2001 Subaru Forester to demonstrate.
No, its not ACTUALLY flat, but who cares? Same principles.
First check to see if you have all of the proper equipment in your trunk:
- Spare tire (regularly check its air pressure)
- Lug Wrench
- Scissor Jack with pivot arm.
Step 1
- Loosen Lug nuts wit lug wrench (counterclockwise). DO NOT REMOVE THEM ONLY LOOSEN
Step 2
- Position scissor jack. For most cars, there is a stiffened support in the unibody that allows a lifting point. Please consult your owners manual for the proper jacking points.
Grasp offset part with main hand.
Then using your secondary hand as the bearing and main hand as the motor. Rotate the arm so that it lifts the jack towards the car, eventually lifting the vehicle.
Remove the lug nuts fully and remove wheel.
Install spare tire, then reverse removal for installation. MAKE SURE YOU TIGHTEN THE LUG NUTS VERY TIGHT!
Thursday, June 19, 2014
Knowledge is Key!
So I've noticed that a lot of my fellow college students, and people in general, have no idea how a car works, let alone how to repair it. Therefore I will also be posting information in an attempt to better educate folks on the basic function of a car. For instance, what components of the vehicles intended functions are and how to locate these components when a repair is needed. Once you understand how a car works it will be much easier when you have to diagnose and repair a problem.
Subscribe to:
Posts (Atom)


